If you want to illustrate your own picture book or are thinking about taking on an illustration project, here are some things to consider to help you quote accurately, plan efficiently, and have a lovely finished product. 1. Time The most important thing I learned is that illustrating an entire book is a time consuming project. However long you think it will take, it'll probably take 50-100% longer. We always overestimate how much we can get done, and this project was no exception. Generally picture books are 32 pages including the end pages. That's a lot of pictures! I worked on the book in between other projects and spread the work out over about 12 months. 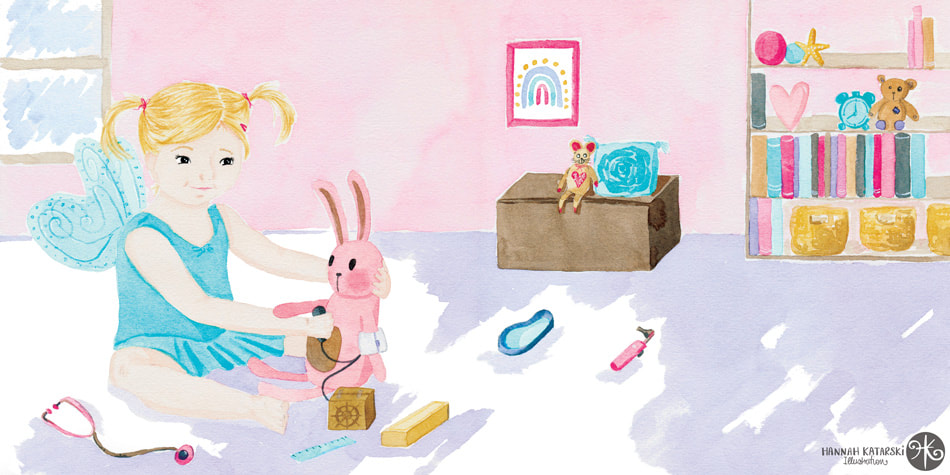
 3. Continuity When working on one-off illustrations, continuity isn't a thing. But a book is one, cohesive work, so the artwork has to be cohesive. One of the important factors in achieving this continuity is the colour scheme. The other obvious one is the style of illustration. The third element is a bit trickier - keeping the characters consistent. This means that the little girl (pictured above) looks like the same little girl on all the pages. Whether she is facing side on or front on, happy, sad, laughing; she needs to look like the same person. She also needs to look the same age. This means getting the facial features just right can be pretty time consuming. You may notice that characters sometimes have the same clothing throughout a book. This helps us quickly identify them as we read. It helps with continuity. In Mummy's Midwife, I wanted Harper to have lots of different outfits because little girls often love playing dress-ups. This meant I introduced other elements to help her look the same. She always has pigtails and a clip.  4. Revisions/Art direction Circling back to 'Time', there will be a number of revisions that need to be made at several stages throughout the project. From composition, to character tweaks, to colour changes. Communication is key as well as being a good project manager. It is important that you seek feedback at each stage and incorporate it before moving forward. It also needs to be made clear that once that project stage is complete, it is done. When working with traditional media, changing all the colours after painting isn't really an option, unless the budget is altered to allow for a full repaint.  5. File setup It's really important to know the book format from the outset. What size and orientation will it be? Also, what format will the artwork be required in order to be integrated with the rest of the book? Will it need to be converted to CMYK or will the Printer convert from RGB? You might need to leave a certain allowance/overflow around the edge for trimming (called a bleed) and you may need to allow for the gutter (where the binding/stapling happens) I set up my colour roughs at 300dpi in procreate so I could print them out fuill size. I then painted a double spread on an A3 page. I then scanned at 600 or 800 dpi to ensure I'd have the correct page size at 300dpi (print quality). Depending upon your arrangement, someone else might scan and clean up the artwork. But on a small project you would likely be doing that. Ensure you discuss this and quote accordingly. Seeing the artwork come together with the text and full layout is a real milestone. Ideally you will see a proof so you can liaise with the book designer/client about any tweaks that are needed to colours or vignetting around artwork. Illustrating a book has been a challenging and incredibly rewarding project. Whether you are planning to illustrate you own book or have been asked to work on someone else's, hopefully this article helps you consider some of the important factors for success.
Have experiences you'd like to share? I'd love to hear about them below.
0 Comments
Leave a Reply. |
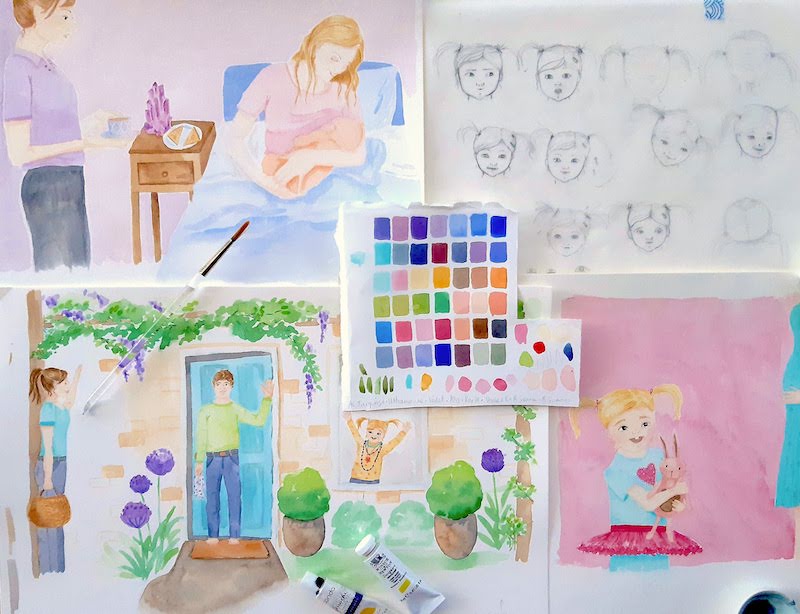
WELCOME TO MERMAiD'S COiNSurf Artist, Hannah Katarski is based in Fremantle, Western Australia. She creates ocean-inspired art that is bohemian, retro and fun. Categories
All
Instagram @MermaidsCoin |

 RSS Feed
